
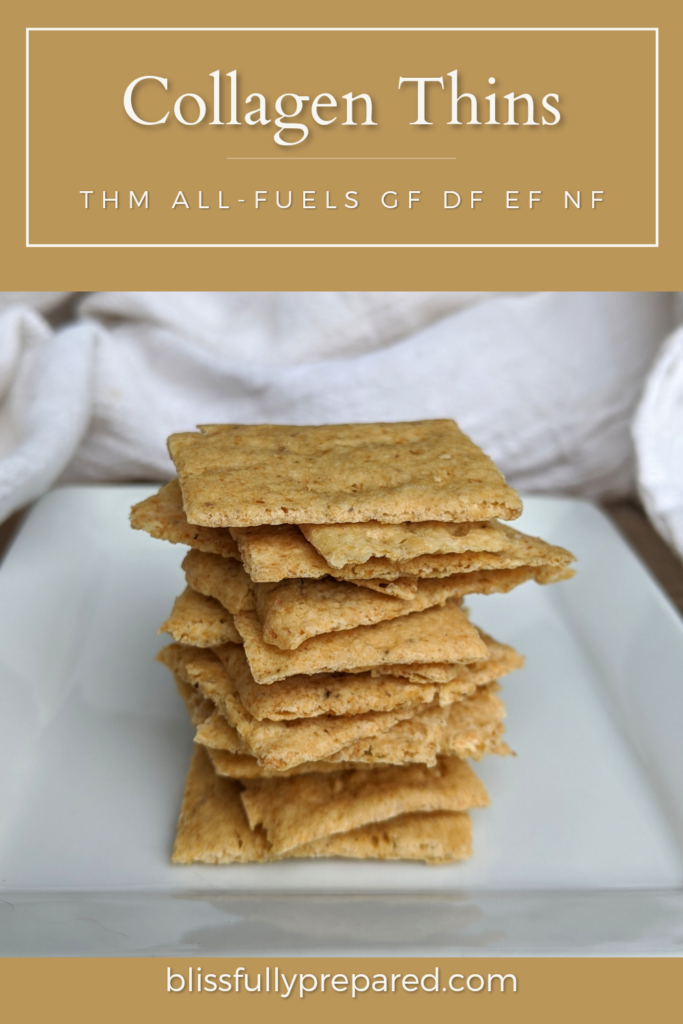
Collagen Thins: THM All-Fuels GF/DF/EG/NF

As an Amazon Associate, I earn from qualifying purchases. I am also an official THM Affiliate and am earning a percentage off of links used in the above content that may link directly to the THM online store. This is at no cost to you. Please see my Affiliate Disclosure for more information.
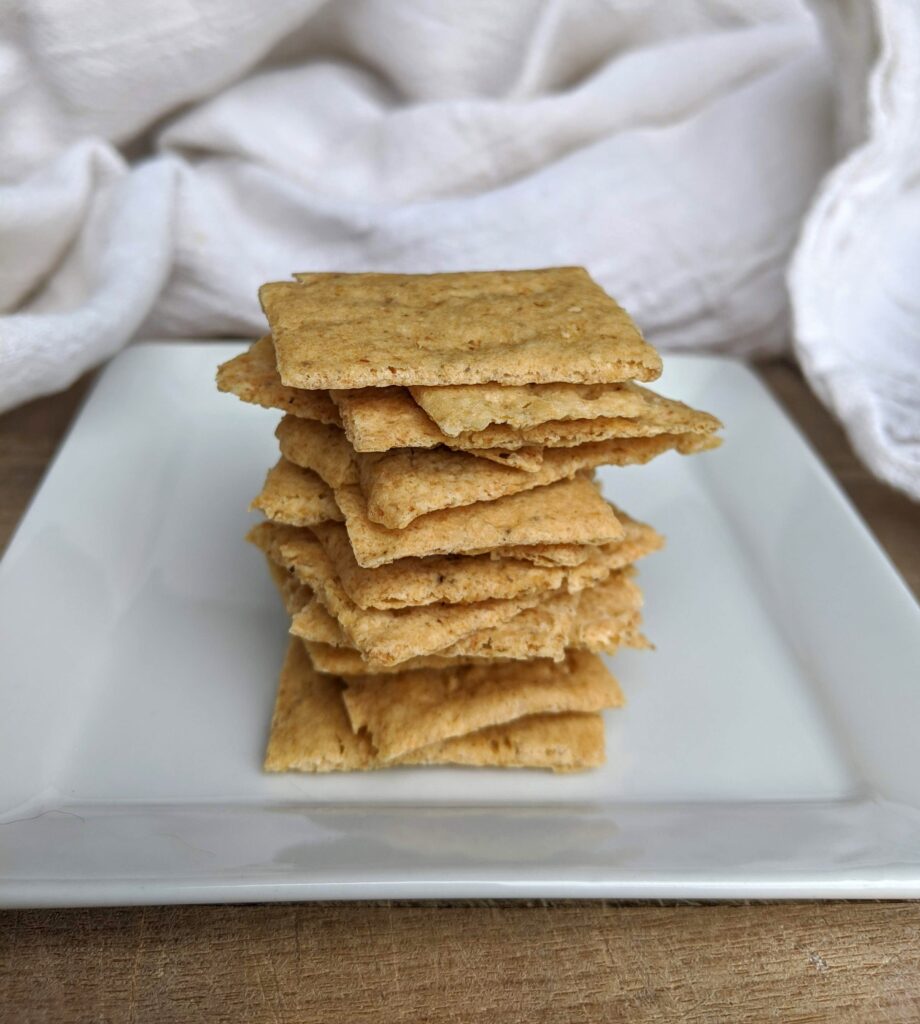
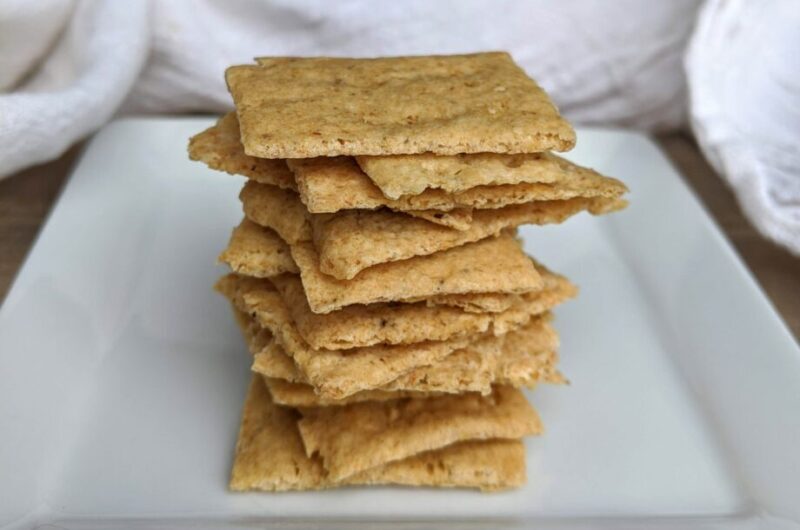
Collagen Thins are the new Wheat Thins or Nut Thins! And are keto, high-protein, gluten-free, dairy-free, egg-free, corn-free, nut-free, seed-free and THM All-Fuels!
Finally a truly GUILT-FREE and HEALTHY crispy cracker (or chip!) that you can have in Keto or ANY THM fuel settings! Instead of being made of gluten, nuts, seeds or cheese, Collagen Thins are mostly made of – you guessed it – COLLAGEN!
In case you haven’t heard, Collagen is an amazing SUPERFOOD! It’s high in protein and gut-healing properties! It’s also great for the joints and for healthy hair, skin and nails! But it’s also zero carb and low calorie and great in baked goods, like these Collagen Thins!
Collagen Thins are also high-fiber and essentially zero net carb!
These crispy snacks are full of protein and fiber but without the fat and carbohydrates! Like collagen, oat fiber and psyllium are also essentially zero net carb because they are basically pure fiber – which is great for digestion/healthy weight and keeps you full longer between meals. And they’re also extremely low calorie! One serving (equal to about 16 crackers) is only 62 calories, 0.6g fat, 0.2g net carbs (7.8g fiber) but has 12g protein! It doesn’t get much better than that!

Are Collagen Thins *exactly* like “regular” crackers?
The short answer – no. These are not *exactly* like empty calorie “regular” crackers. After all, they use far from “regular” ingredients and are actually nutrient-dense and allergen-friendly. But they are crispy and satisfying with a hearty savory flavor. I personally LOVE them! And I’m really not just saying that; I make these ALL.THE.TIME! My favorite way to make them is saltine-style and have them with natural peanut butter. SOOO.GOOD!!! And I love that they basically have no carbs/fat/calories of their own – though are a good source of protein – so they really are guilt-free snacking at its best!
And, while they are really easy to make, they may take a couple tries to perfect. But don’t give up on them – they really are worth it! The key is to get the dough as thin as possible. Different ingredient brands will require slightly different amounts of water. So, while I now always make double batches, start with a single batch first until you get a feel for what works best with your specific ingredient brands.
How to make Collagen Thins:
These are super easy to make and are mostly made in the blender! Measure the water and oil/fat into your blender and, with the blender on low, slowly add in your mixed dry ingredients. Once all the dry ingredients are added, put on the blender lid and turn on high. After a few seconds, turn your blender off and scrape down the sides and then turn the blender back on. The batter should blend for about a total of 30 seconds. After blending, add (by hand) any herbs or seasonings that you’d like such as garlic powder, nutritional yeast, etc.
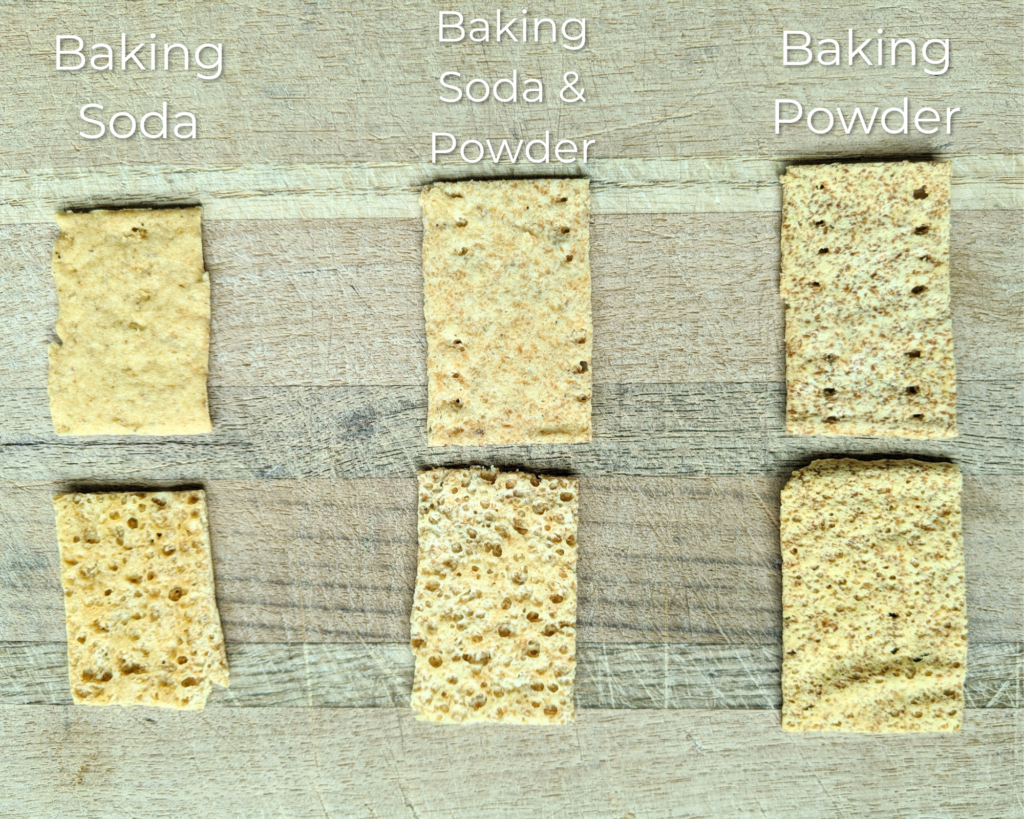
I find that these crackers work with either baking soda or baking powder (or both). I prefer using baking soda for crackers and baking powder for chips. Or you could use mixture of both for something in between.
Now, if you’ve made other cracker recipes before, you will notice this batter is not thick enough to roll and cut. But, don’t worry, the batter should be thin/pourable like pancake batter (and will have the texture of applesauce). We will cut them into squares later. In my opinion, these are actually easier to make than other crackers!
Ready to bake!
So you’ll notice on the recipe card that I recommend using either a silicone mat along with parchment paper or two pieces of parchment paper. Let me explain.
As noted, this cracker batter is very “wet” and cannot be rolled/cut like other crackers doughs. What I find works best for me (and you might find something that works better for you) is to place a silicone mat in my sheet pan and then lay a piece of parchment paper on top of it. This is so, half way through baking, I can flip the parchment paper over onto my silicone mat/other parchment paper and peel the parchment paper (the one the cracker batter is stuck to) off of the cracker dough (to allow the underside to dry/crisp better).
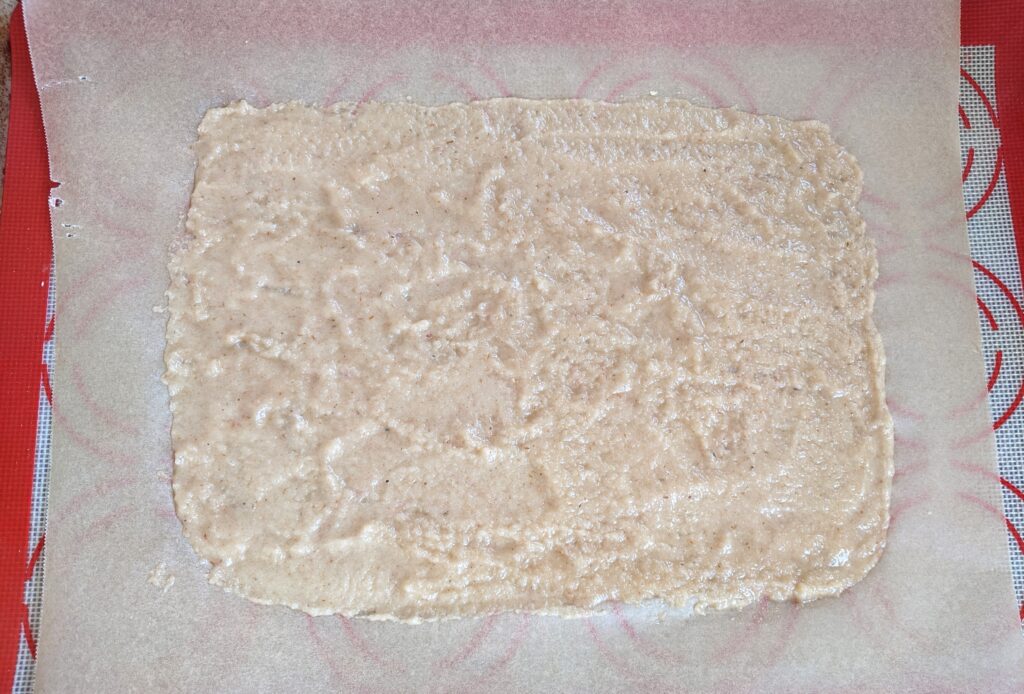
Now we are ready to bake! I pour my cracker batter onto the parchment paper and spread it as thin as possible into a rectangular shape.
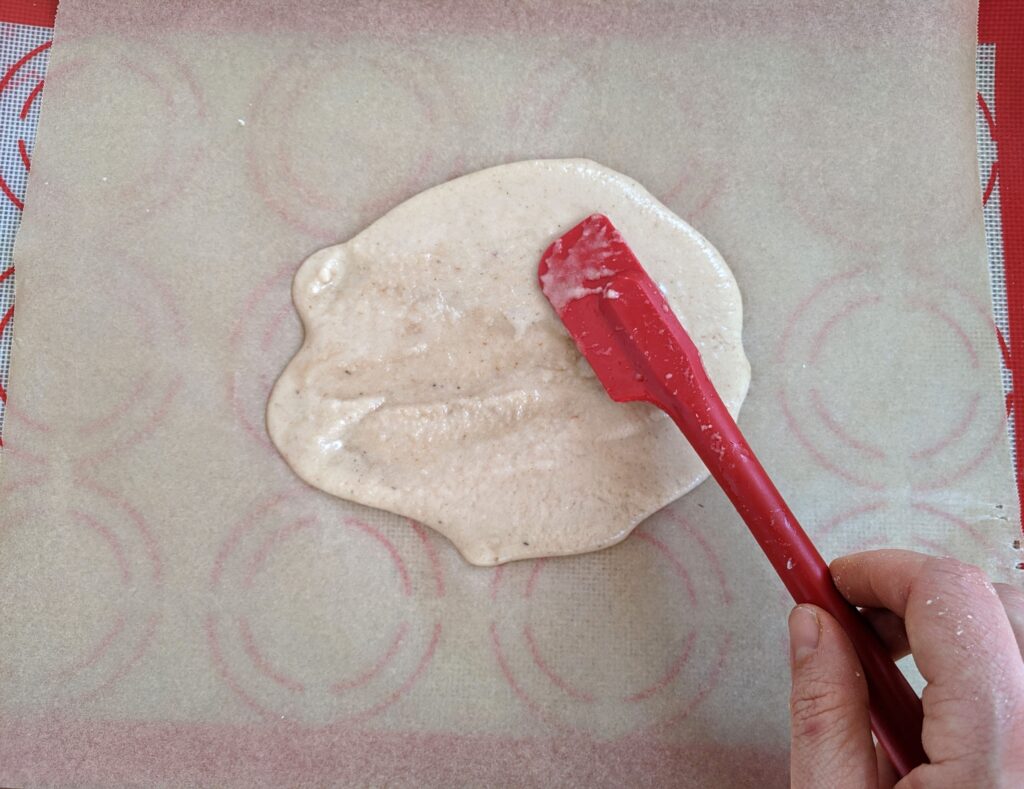
I spread the batter the best that I can with my rubber spatula and then go back with wet fingers (to keep batter from sticking) to fill in any gaps or bare spots. If topping with seeds, you can add them at this time.
It’s then ready to put into the 350* oven. Overall, the crackers will bake for 30-40 minutes total (longer for double batch). But, of course this will vary, depending on thickness of dough, pan, oven, etc. You’ll want to be around in the kitchen as these bake, as we will need to do a couple steps during their bake time. I usually have my timer counting up instead of down for this recipe.
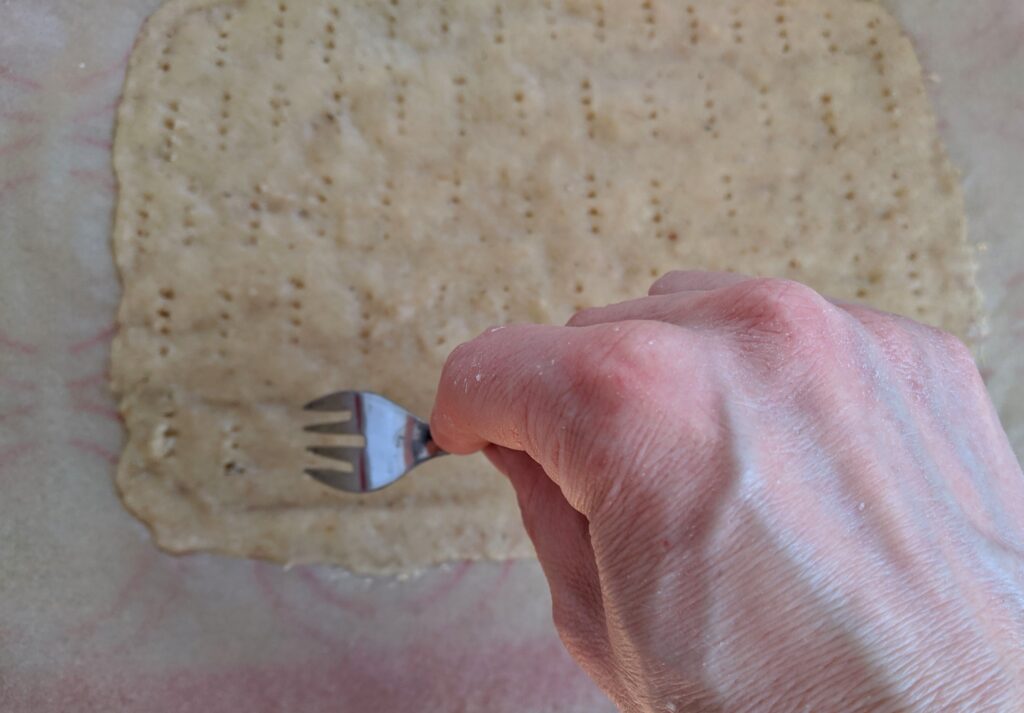
At the 5-7 minute mark of baking:
Around the 5-7 minute mark of their baking time, when the batter starts to puff up a little and starts resembling more of a dough than a batter, briefly take the pan out of the oven.
It’s now time to prick the dough with a fork, making small holes to allow the crackers to dry/crisp better. I work near the sink for this so that I can wet the tips of the fork in between each row of pricks to keep dough from sticking to the fork. I also like to sprinkle a little sea salt on top at this time (like saltines) and then return the pan to the oven.
At the 20-23 minute mark of baking:
Then, around the 20-23 minute mark of baking, when the dough starts to brown a little around the edges and the surface of the dough is mostly dry, we briefly take them out of the oven again.

Using hot mitts to protect my hands, I take the parchment paper (the one on top with the crackers stuck to it) and flip it upside down onto my silicone mat/other parchment paper. Then I gently attempt to peel the parchment paper off of the underside of the cracker dough. If the dough still seems too wet and is clinging too much, put the pan back into the oven for a couple more minutes and try again (you can keep dough upside down).
After the parchment paper is removed and the bottom of the crackers are now facing up, we can now attempt to cut our crackers. Again, make sure to wear oven mitts to protect your hands (though the pan will cool down after few minutes). I use kitchen shears (keep blades wet to prevent dough from sticking) to cut mine. If dough still seems too wet/delicate, put back in oven for a couple more minutes and try again.
For crackers, I cut my dough into 32 squares/rectangles (can make smaller, too). For crispbread, I cut into 8 rectangles. You could also cut into triangles to make tortilla chips.
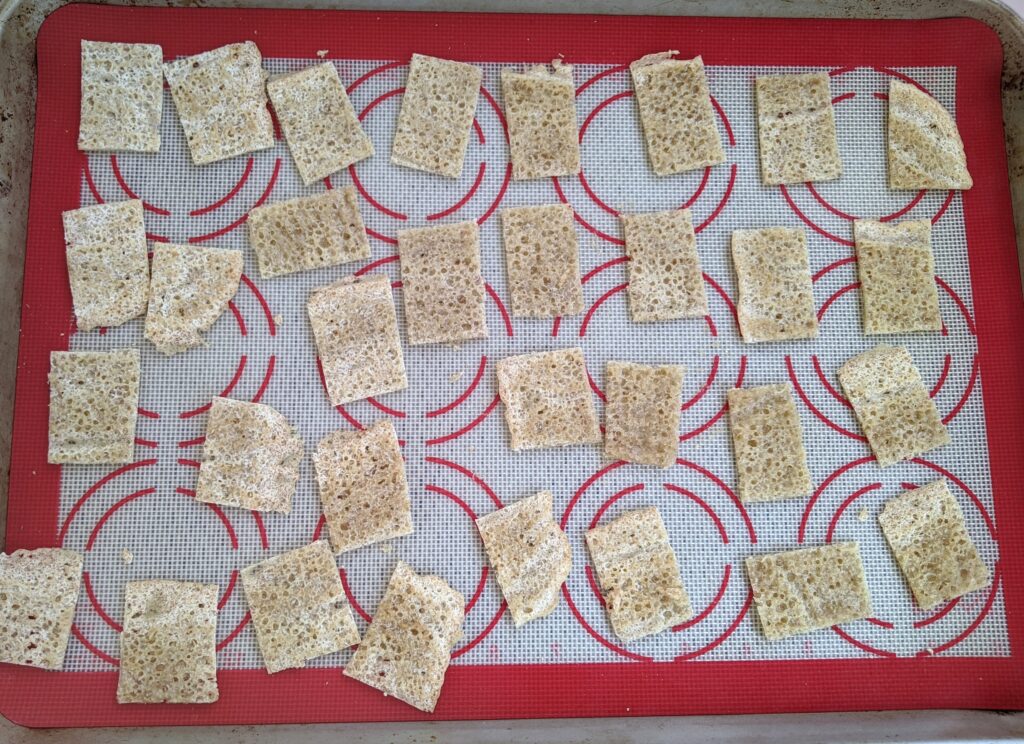
I then make sure my crackers are well-spaced (ie not overlapping) and return them to the oven.
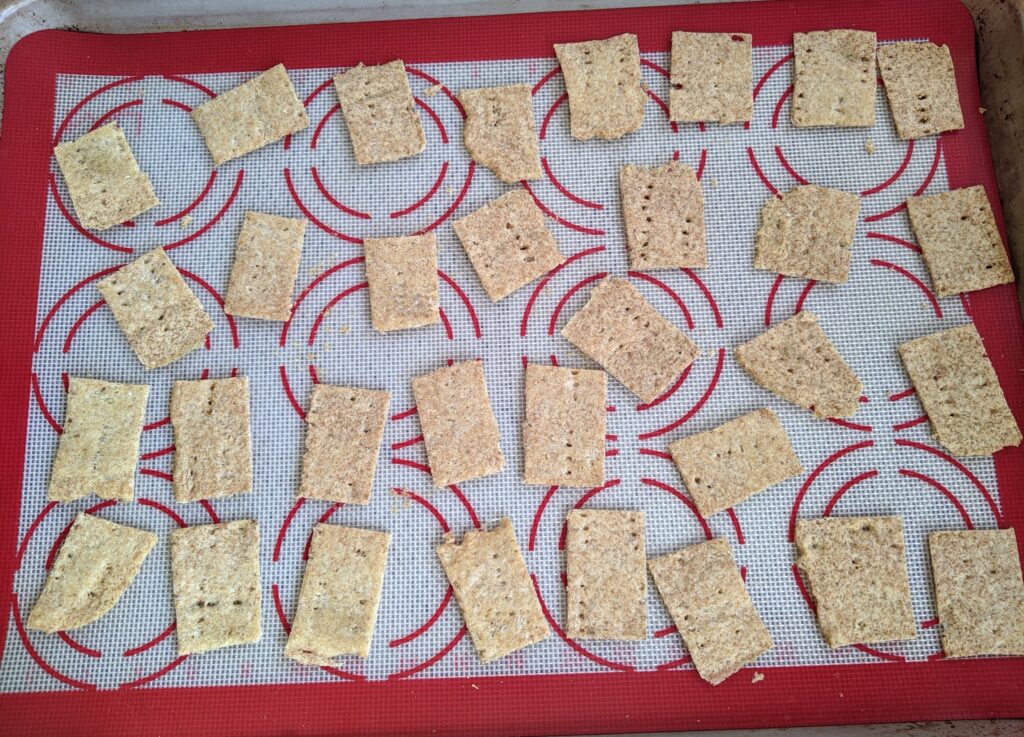
I let them bake upside down for about 5-10 minutes and then flip them right side up again and return to the oven to finish baking.
If you have a food dehydrator:
If you have a food dehydrator, feel free to transfer them to it to finish drying/crisping once they have browned to your preference. But I personally don’t let mine get too brown or they will taste burned/bitter. Therefore, I wouldn’t recommend baking them at 350* for more than 40 minutes total (or 60 minutes for a double batch). I remove mine from the oven when they no longer look “wet” and are firm/becoming crisp.
I have an Excalibur 9-tray dehydrator but you don’t need a dehydrator to make these crackers. If they are still not dry/crisp to your liking after 40 total minutes (I let my timer keep counting, even when cutting crackers, etc), turn your oven down as low as it will go (mine goes to 170*) and continue baking until fully dry/crisp. They also crisp up more as they cool on the pan after baking.
Storing Collagen Thins
When baked to your liking, take out of oven/dehydrator to cool. Then store in air-tight containers or baggies. These can be stored at room temperature and should keep as long as any other homemade crackers. They’re so yummy, though, that they probably won’t be around long enough to get stale. At least mine aren’t anyway! 😋
Way to enjoy Collagen Thins
These are so versatile, y’all! Especially since they can be enjoyed in ANY THM fuel setting and are allergen-friendly! Add any herbs/seasonings/seeds/etc that you want!
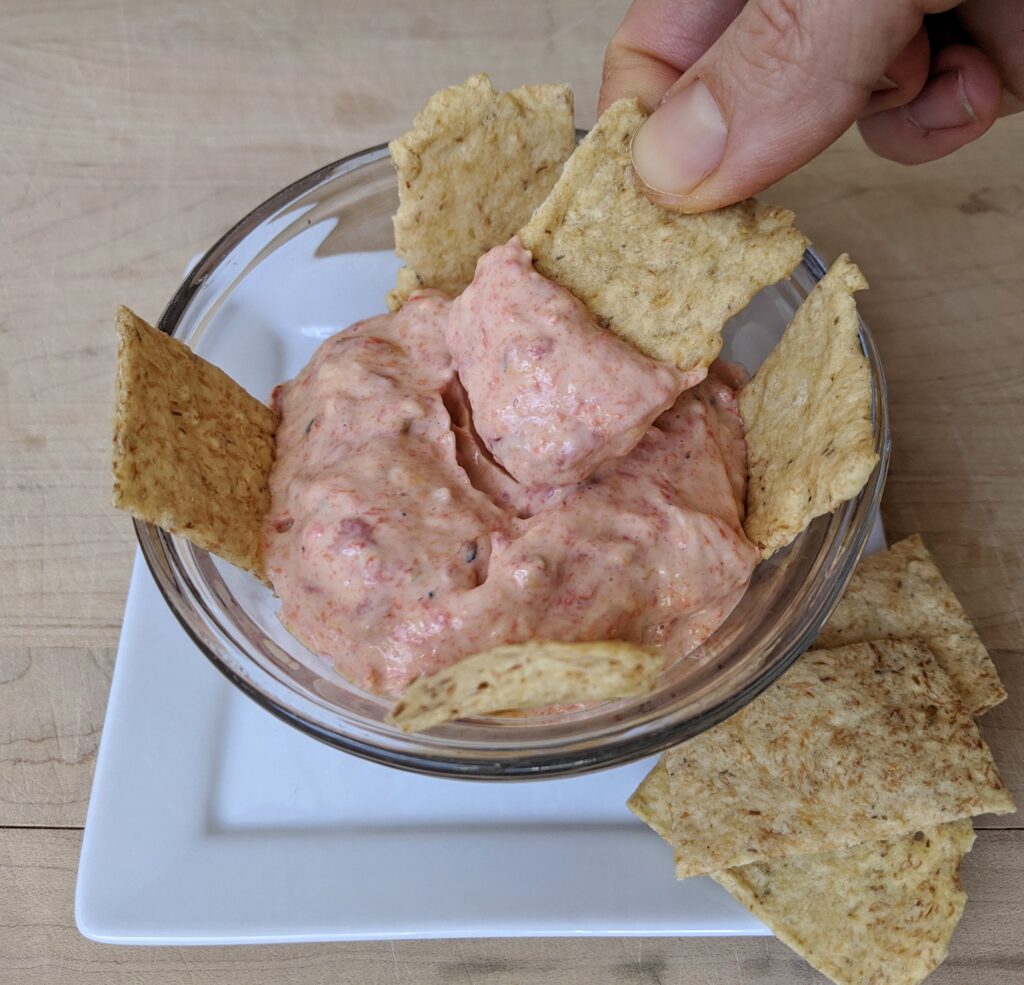
Use them as you would use any crackers/chips: in dips (like this hummus!), with cheese or nut/seed butters (my personal fave is with natural peanut butter 😋), as crispbread, in soups or on salads, with nachos (like with DF cheese sauce in THF) or salsa, etc! Crackers/chips are BACK, y’all!!!
Helpful tools for making Collagen Thins:
Collagen Thins: THM All-Fuels GF/DF/EG/NF
Course: Snack, THM All-Fuels, Crackers, Chips, CrispbreadCuisine: AmericanDifficulty: Easy2
servings10
minutes40
minutes62
kcalCollagen Thins are the new Wheat Thins or Nut Thins! And are keto, high-protein, gluten-free, dairy-free, egg-free, nut-free, seed-free and THM All-Fuels!
Ingredients
- Wet Ingredients:
-
5 TBS water (or more to make easier to spread thinly – I usually make a double batch and use 3/4 cup total of water)
-
1/4 tsp neutral flavored preferred oil/fat (melt first if using a solid fat like butter or coconut oil)
- Dry Ingredients:
-
1/4 cup (28g) collagen peptides
-
3 TBS (14g) oat FIBER*
-
2 tsp (3g), rounded, whole psyllium husks/flakes (or 1 tsp – level – ground/psyllium powder)*
-
1 tsp sweetener*, or more (I use Lakanto Golden but any 1:1 sugar substitutes or equivalents should work fine – I often use 3 tsp for a double batch)
-
1/4 tsp sea salt
-
1/8 tsp baking soda (for crackers) OR baking powder (for chips), or try mixture of both for something in between.
- Optional extras:
-
Sea salt
-
Seeds, herbs, spices, nutritional yeast, etc
Directions
- Preheat oven to 350* and line sheet pan with silicone mat and parchment paper or two pieces of parchment paper (for flipping Collagen Thins half way through baking). Before starting, make sure to look at pictures and read baking instructions above.
- Mix wet ingredients into blender.
- Measure and mix dry ingredients in small mixing bowl.
- With blender on low, slowly add dry ingredients into wet ingredients and put lid on and turn to high. Stop after few seconds and scrape down sides and blend again. Blend for about 30 seconds total. By hand, stir in any extras you wish to add like herbs, spices, etc. Wait to add additional sea salt at the 5-7min mark of baking time.
- Cracker batter should be about the thickness of pancake batter (with applesauce-like consistency). Scrape out batter from blender onto parchment paper and spread into rectangular shape as thinly as possible without leaving holes/bare areas. I first use a rubber spatula to spread and then wet the tips of my fingers (since batter is sticky) to even out/fill-in any gaps. If adding optional seeds, you can sprinkle them on at this time.
- Then put in oven. Overall the crackers will bake for 30-40 minutes (this will vary depending on thickness of crackers, pan used, specific oven temp, etc, so watch first batch closely). At between 5-7 minute mark, when batter has started puffing up a little, briefly take out of oven and make little holes across the cracker dough using a fork (keep tips clean and wet so dough doesn’t stick to fork; if dough starts to stick, rinse fork off and resume). Sprinkle optional sea salt on top of dough, if you like. Then place back into oven.
- At around the 20-23 minute mark, when the top of the dough appears to be mostly dry and the edges are starting to brown slightly, take out of oven again and, using hot mitts to protect your hands, flip the dough over onto the other parchment paper/silicone mat and see if you can gently peel the extra parchment paper off of the bottom of the dough. If dough still seems too wet, put back in oven for a couple more minutes and then try again.
- With the underside of the crackers facing up now (to help dry/crisp more evenly), and with hot mitts on, see if you can cut dough into squares (or whatever shapes you prefer). If dough still seems to wet/delicate, return to oven and try again after a couple more minutes of baking. I use wet kitchen shears (so dough doesn’t stick) to cut my crackers. I usually cut mine into 32 squares for crackers or 8 rectangles for crispbread. Make sure crackers aren’t overlapping so they dry out better. Then put back into oven.
- You can flip them back over after a few more minutes of baking, just to help them dry out more evenly. Mine are usually ready by the 40 minute mark (which includes the times that I took out of the oven). If they’re still not fully dry/crisp, you could turn oven down to 170* to let them continue drying or transfer to a food dehydrator, if you have one. I have a food dehydrator, so that’s what I use, but oven should work fine, just keep an eye on them so they don’t burn. They also crisp up more after they cool on the pan after coming out of the oven.
- When fully dry/crisp and cooled/room temperature, you can store them in air-tight container or baggy. As long as they are well-sealed, they should be fine at room temperature. I’ve never had any sit around more than a few days to know how long they will keep because they’re so yum. 😋
Notes
- If any ingredients appear to have a line through them, just click to side of ingredient (or on another ingredient) and the line should disappear. It’s a feature of the recipe plugin that allows people to cross off ingredients as they add them to a recipe. Also, the print feature of this plugin is a little wonky so always check over recipe print-outs to make sure all ingredients are included and correct. Another option is to copy and paste the recipe text and print through a different program.
- Each recipe makes 2 servings of about 16 crackers. Each serving is approximately 62 calories, 0.6g fat, 0.2g net carbs, and 12g protein.
- If using a different sweetener, check out this sweetener conversion chart.
- Other protein powders could possibly be substituted but I haven’t not tested others yet. I would try using less than what is called for of the collagen since other proteins are generally more absorbent/drying than collagen is.
- Oat fiber is not the same as oat bran, oat flour, etc. It usually needs to be purchased online. It’s possible that coconut flour could be substituted but I have not tested this. Generally 25% less is needed since coconut flour is more absorbent. Also, coconut flour is not compatible with Deep-S.
- Psyllium is pretty crucial to this recipe and I would not recommend omitting or substituting something else for it.
- Can double recipe but will completely fill cookie sheet. Also helps to add a couple extra TBS of water to the batter if doubling. Also, the cook time will be a little longer.
 LifeSource Foods Oat Fiber 500
Nutrition Facts
2 servings per container
- Amount Per ServingCalories62
- % Daily Value *
-
Total Fat 0.6g 1%
-
Total Carbohydrate 8g 3%
- Dietary Fiber 7.8g 32%
- Protein 12g 24%
* The % Daily Value tells you how much a nutrient in a serving of food contributes to a daily diet. 2,000 calories a day is used for general nutrition advice.
You might also like:
Amazon and the Amazon logo are trademarks of Amazon.com, Inc, or its affiliates.